


In this quick guide, you will see, how to enable the 2-Factor authentication on Ubuntu. This guide can also be used on its derivatives.
Before going straight, let’s see what is 2-Factor authentication?
Simply put, it’s an extra layer of protection that you can be put on things that have passwords so that you are required to provide a time-based token for authentication addition to the password.
Now, let’s set it up on Ubuntu.
Setting up 2-Factor Authentication on Ubuntu
First of all, you need to install the authenticator package on your Linux distribution.
sudo apt-get install libpam-google-authenticatorAfter getting the authenticator library in the system, you need to add the below line in the config file.
You can open the common-auth file in the nano.

sudo nano /etc/pam.d/common-authThis will open the file into the nano editor, here you just have to add this like and save the file.
auth required pam_google_authenticator.so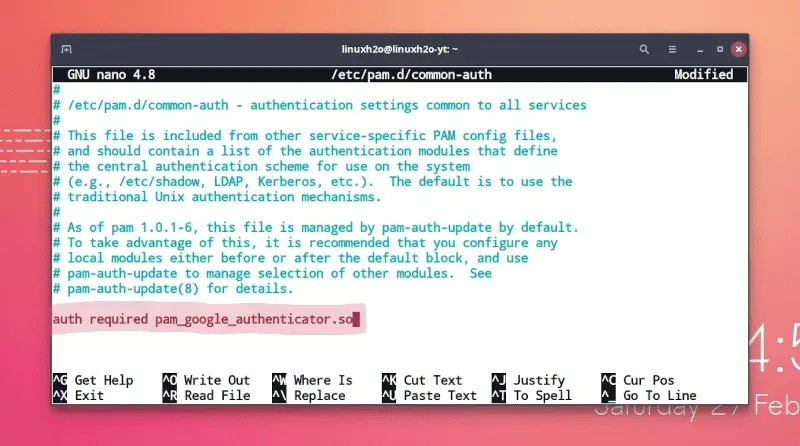
After adding the above required, you need to save the file with Ctrl+O and then exit from the nano editor with Ctrl+X.
Lastly, you just have to generate the QR code so that you can scan it using any 2-factor authenticator application. In this guide, I am going to use Authenticator.
Execute the command to generate it.
google-authenticatorNow, that you have the QR code, simply open the authenticator application and scan the QR code.
With that everything has completed successfully. Just logout from the distribution and log in again, it will ask for the 2-Factor authentication while logging into the system.
Watch Video guide on YouTube
Additionally, You can also watch a step-by-step video guide on YouTube to get a better understanding of it.
Conclusion
So that’s it on how to set up and enable 2-factor authentication on Ubuntu and its derivatives. Let me know what you think about it in the comments and subscribe to the LinuxH2O Youtube channel. Till then, keep enjoying Linux.


' font-size='7.328' font-family='dinb, Roboto, sans-serif' letter-spacing='0' word-spacing='0' fill='%23585858'%3E%3Ctspan x='19.173' y='11.062' font-weight='bold' font-family='dinb, Roboto, sans-serif' %3E235+ video guides%3C/tspan%3E%3C/text%3E%3C/svg%3E)


