Hello there, this is TakshakSH and you are reading a LinuxH2O article. In this quick and easy guide, you will learn how to set up your Linux distribution so that you can use the wifi & enable hotspot both at the same time.
For this guide, I will be using the latest Linux Mint 20 Ulyana but you are free to use whatever Linux distribution you like. This guide will work on all of them. We will also use some utilities like “create_ap” and “hostapd“ to enable the hotspot functionality. So let’s get started now, shall we!
Also check out: How to enable snap support in Linux Mint 20
Setup for use wifi & hotspot at same time
First of all, we have to install the hostapd utility in the system. You can use the installation command for that as it is already available in the official repositories.
For Ubuntu, Debian and derivatives
sudo apt install hostapd
For Fedora, RedHat or CentOS
sudo dnf install hostapd
In case you are not able to install the hostapd package with the above commands then you can download the package file for your distribution from the pkgs.org.
Need help on how to install packages : Installing applications in Linux | Complete guide
After installing the hostapd, you need to get the create_ap from the link below. Simply download the zip file extract.
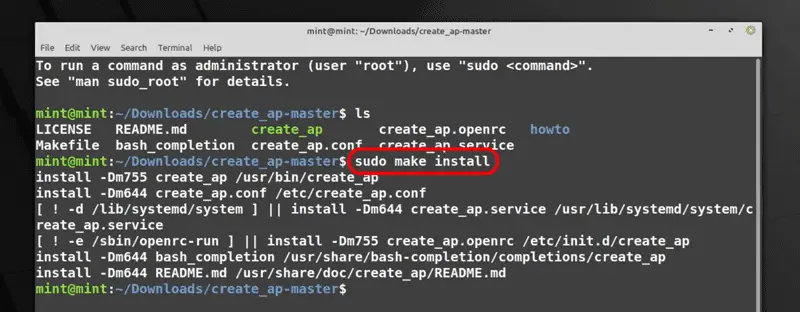
Now we have to install create_ap in the system, for this navigate to the extracted folder and run the below command.
sudo make install

The setup is complete, let’s start the hotspot/tethering now.
Enabling hotspot/tethering on Linux
To enable hotspot, simply check your wifi interface name and create an access point with create_ap utility.
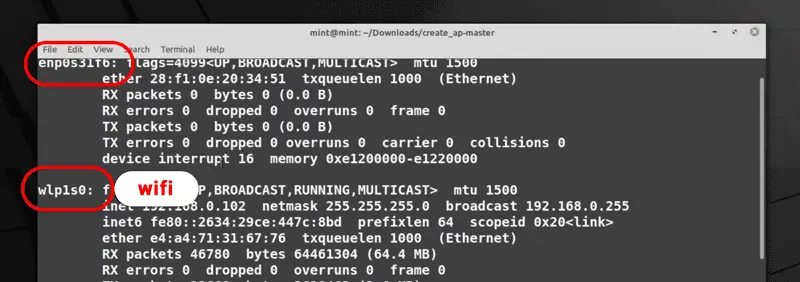
To check the name of the wifi interface, execute the below command.
ifconfig
Result for the ifconfig commnad.

“wlp1s0” – This is starting with character “w” so this is the wifi interface name and the one starting with “e” is for Ethernet. It varies hardware to hardware.
Simply copy the name and execute the create_ap command to enable hotspot.
sudo create_ap interface interface SSID password
So in our case the interface name for the internet source and hotspot is “wlp1s0” and wifi name is “LinuxH2O” and the password is “linux123”.
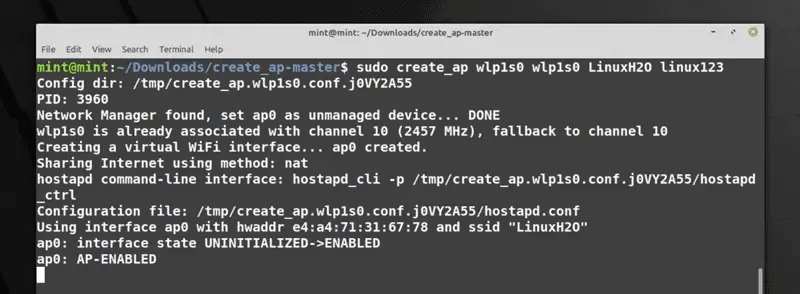
sudo create_ap wlp1s0 wlp1s0 LinuxH2O linux123
Result of the above command.

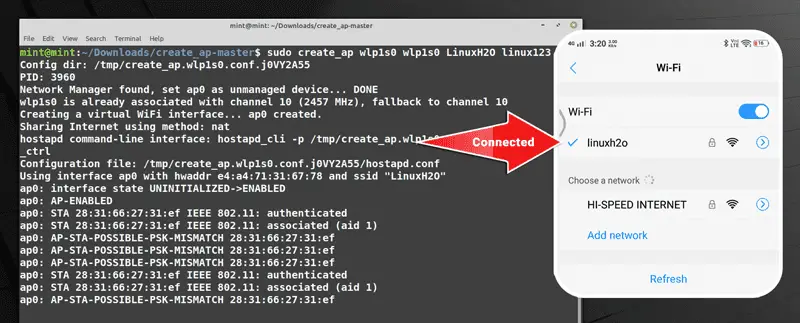
Now you can turn on wifi in your smartphone or any wifi enabled device, you will see a network by the name “LinuxH2O” select it and type the password to connect. You will be able to access the internet and the network.

Watch Video guide on YouTube
Additionally, You can also watch a step-by-step video guide on YouTube to get a better understanding of it.
Conclusion
So that was the guide on how to use wifi and enable hotspot/tethering at the same time in Linux. Let me know what you think about it in the comment section below and don’t forget to subscribe to the LinuxH2O Youtube channel. Till then, keep enjoying Linux.


Hi, I followed your tutorial to the best of my ability, and was not able to complete the last step, you stated the command: “`sudo create_ap wlp1s0 wlp1s0 LinuxH2O linux123“` I have completed these steps, (changed SSID and Password, of course) and I am receiving an error: “`sudo: create_ap: command not found“` I tried running without sudo, and got “`create_ap: command not found“` I have tried everything I can think of, and still haven’t been able to fix this. I am running Ubuntu 22.04.3 LTS and my wifi interface is wlp2s0, I tried wlp1s0 also, and it didn’t work either. Thanks a bunch!
After restarting the laptop, the SSID is not showing in mobile. How to resolve this type of issue