We all love additional functionalities in everything. This is one of the reasons why we use Linux. Many Linux distributions use Gnome Desktop Environment. It is user-friendly and has support for extensions. In this quick guide, you will learn how to install extensions in Gnome.
Extensions are great when it comes to adding different features easily to anything. Whether it is our browser or desktop environment. Fortunately, The good thing is that Gnome supports extensions, and believe me there are many good ones out there available for free to use.
So now, let’s get into the setup on how to install extensions in the Gnome desktop environment
Setting up the browser for Gnome extensions website
First of all, we will open up the browser. Most probably, you are using Firefox or Chrome. Now head on to the browser’s extension website and install the Gnome-shell-integration extension. Use the given below links for convenience.
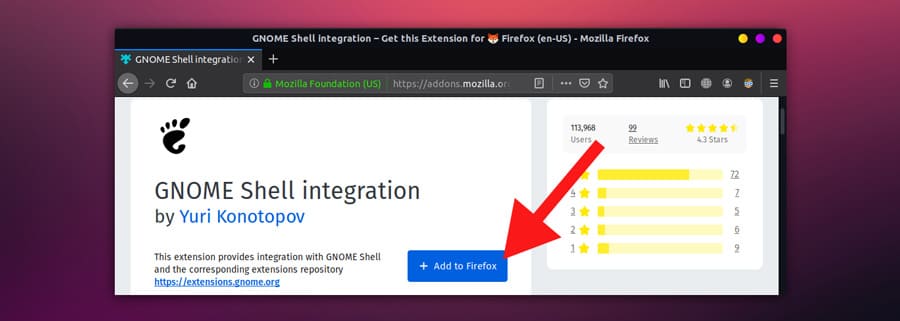
Click on Add to Firefox button to add the integration extension.
Similarly, Use the below link and add the shell extension to Chrome or it’s derivative.
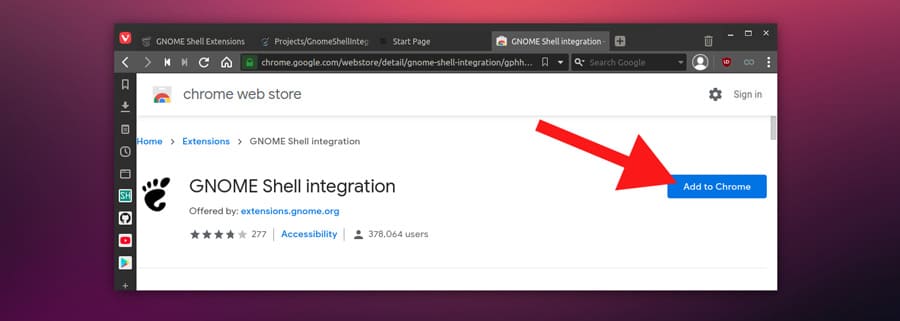
After adding the extension, it’s time to install the native connector for gnome extensions. This can be installed directly using the installation command.
For Debian, Ubuntu & derived using APT
sudo apt-get install chrome-gnome-shellFor Fedora & derived using DFN
sudo dfn install chrome-gnome-shellFinally, installing extensions in the desktop environment
The set up is completed. We can install the extensions from the official website directly, just like we install extensions in the browser. Simply, visit the website using the given link below.
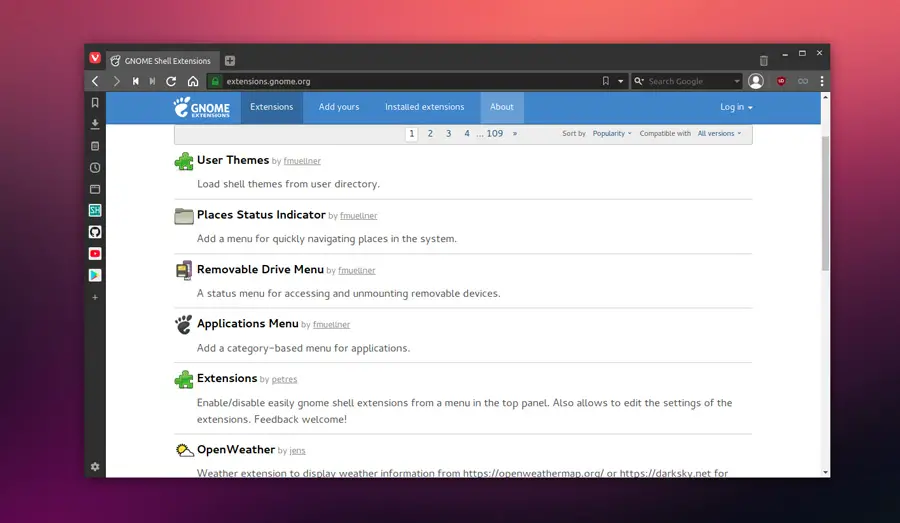
Here you can see the available extensions. Choose anyone and click on it.
I have chosen, OpenWeather extension to see the weather updates on my desktop.
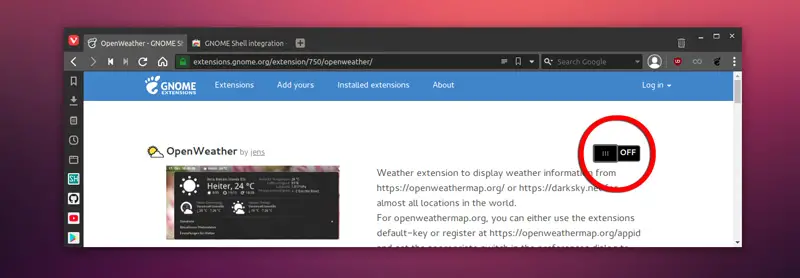
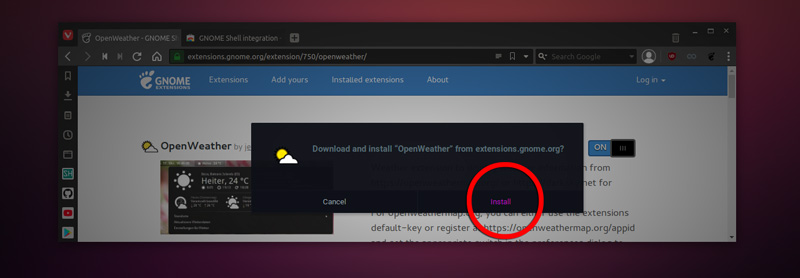
Here, just toggle this OFF button, and a small window will pop up. Now click on the install button to add the extension to the system.
Done. Extension has been added. You can access it from the top panel.
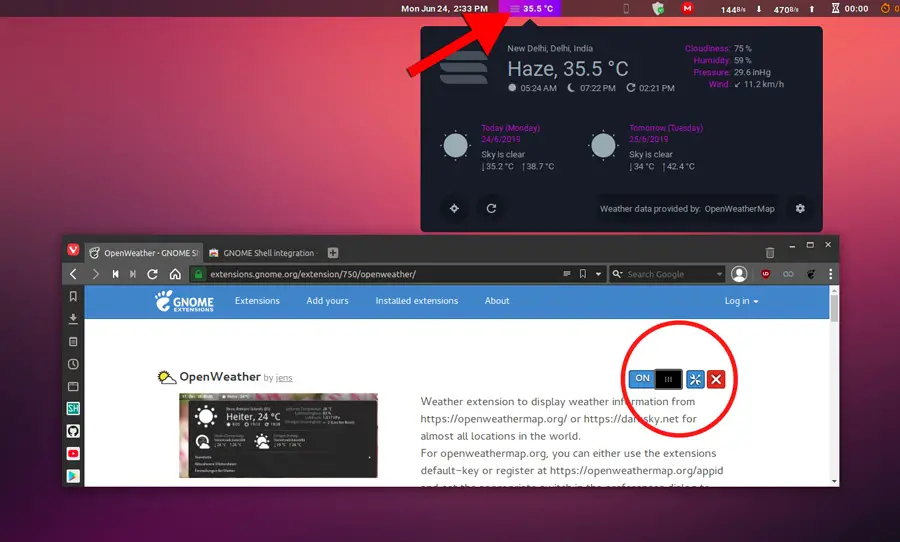
Now, in the picture above, you can see three options.
1. Toggle Button: Use it to enable and disable the extension.
2. Setting Button: To access extension-specific settings.
3. Cross Button: To simply remove the extension.
You can also get the list of installed extensions and manage them at once. For this, click on the Installed Extensions button at the top menu.
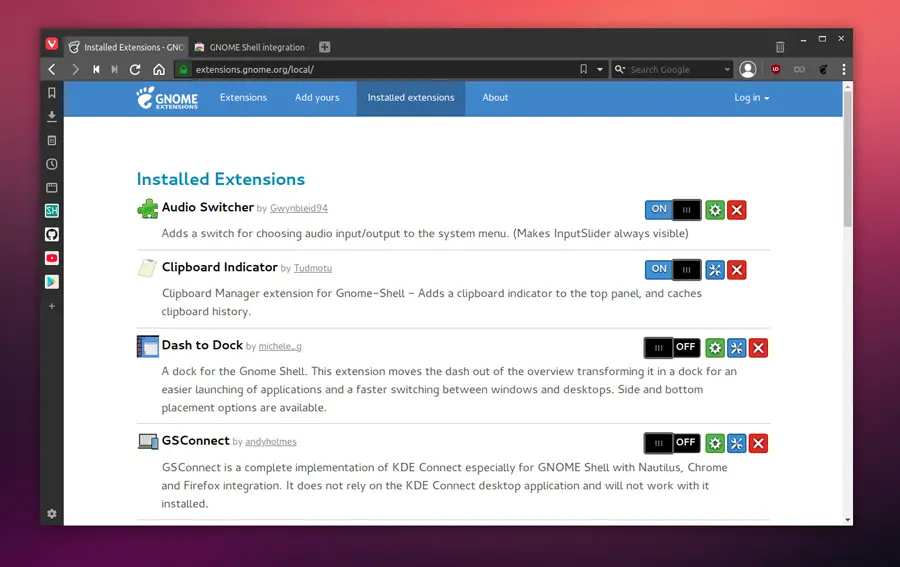
Alternatively, you can also use the Gnome Tweak Tool to manage the extensions that you have installed. By the way, if you have already noticed that green button alongside the ON/OFF toggle. It is simply indicating that an update to the extension is available which you can install by clicking on it.
UPDATE: With the latest Gnome Software Center, you can use it to directly install and manage extensions. Now that is amazing. isn’t it?
Watch Video guide on YouTube
Additionally, you can also watch a step-by-step video guide on YouTube to get a better understanding about it.
Conclusion
So that was it. I hope you find it helpful. Do let me know about it in the comment section below and I will catch you soon. And please subscribe to the Youtube channel.


