


In this quick guide, you will go through the complete process on how to install SQLite and its companion graphical manager SQLiteBrowser on Ubuntu, Debian, and any of their derivatives.
SQLite as the name itself suggests, a lightweight relational database management system contained in a C library. It does not follow the traditional client-server model like any other RDBMS (PostgreSQL, MySQL, MariaDB, Microsoft SQL). Rather, it is just a small self-contained file having everything in it. This file can be embedded into any end program.
Being so small but still SQLite has ACID compliance and implements most of the SQL standards while following SQL syntax. Let’s see how you can get the SQLite in your Ubuntu or Debian distribution.
Also see, How to install & configure LAMP stack on Linux
Installing SQLite on Ubuntu/Debian
Installing SQLite is as easy as any other program, the database is already available in the official repository for both Ubuntu and Debian. You can install SQLite3 the latest version by following the commands.
First make sure your system is up-to-date.
sudo apt-get updateThe ongoing latest SQLite version is 3 so we are installing SQLite3.
sudo apt-get install sqlite3After the installation, you can verify the installed version with this command.
sqlite3 –version

As you can see the installed version in the system is v3.33.0 at the time of writing this article. One thing you will definitely love about SQLite, unlike other client-server databases, it has not configuration setup. So no server, users, or connection management.
Now let’s see how to create a database and insert some data in it.
Create database and table in SQLite
Creating a database in SQLite is quite easy. It has queries that are similar to the standard RDBMS databases. So let’s create a database with a table, I am calling it, “distributions”.
To create a new database or to open an existing one, you can use the sqlite3 command.
sqlite3 distributions.db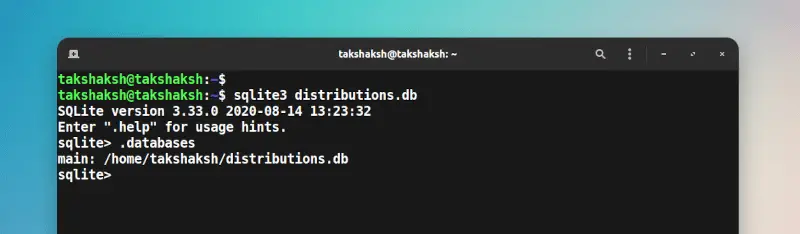
Let’s create a table “linux” with two columns, name and version.
CREATE TABLE linux(name String, version Int);Inserting some data in this newly created table.
INSERT INTO linux VALUES("Ubuntu", 21), ("Debian",20), ("Gnome", 40);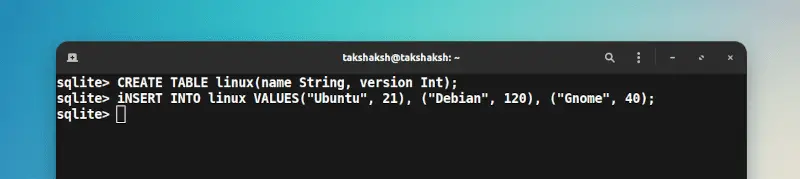
Now that our database has some data in it, we can run an SQL query to get it. You can see the tables that are available in the database with .tables.
.tables;
select * from linux;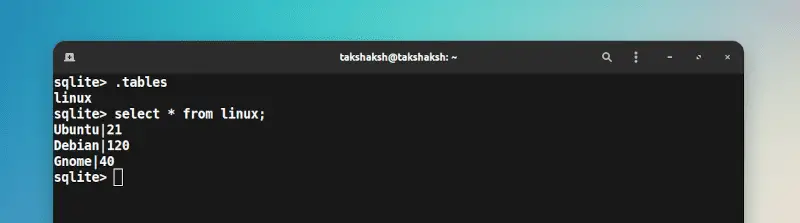
This is one of the ways that you can use to manipulate the SQLite database in your system. However, it’s CLI-based and not everyone is a fan of commands, luckily, there is a graphical tool that can be used for the same purpose. Let’s see how to install it.
Installing sqlitebrowser on Ubuntu & Debian
First of all let’s see, how we can install SQLite browser in the system. There is a strong chance that you can directly install this tool from the official repository. So a simple installation command and you have it.
sudo apt-get install sqlitebrowserHowever, in some cases, it may not be available and in that case, you can download the package file from pkgs.org and install it manually.
Also check: Install Deepin desktop environment in Ubuntu 20.04
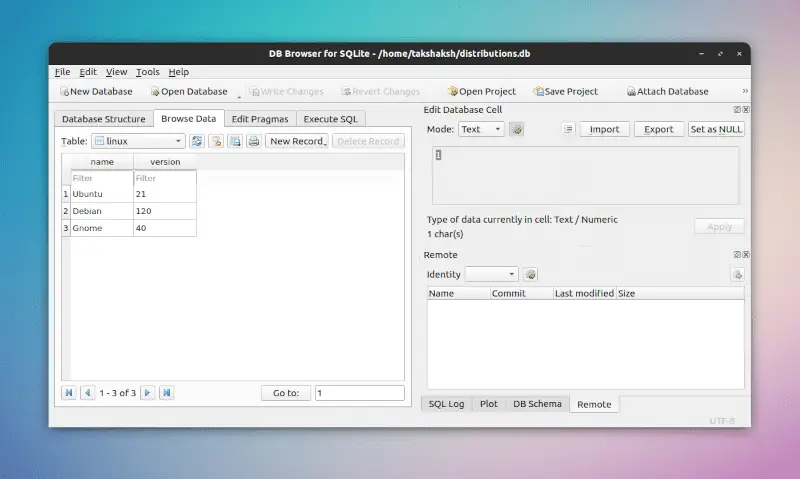
Here is how it looks when you open it after the installation.
Conclusion
So this is how you setup the SQLite database and SQLite Browser in your Ubuntu and Debian distributions. Let me know what you think about it in the comments and subscribe to the LinuxH2O Youtube channel.
Till then, keep enjoying Linux :).


' font-size='7.328' font-family='dinb, Roboto, sans-serif' letter-spacing='0' word-spacing='0' fill='%23585858'%3E%3Ctspan x='19.173' y='11.062' font-weight='bold' font-family='dinb, Roboto, sans-serif' %3E234+ video guides%3C/tspan%3E%3C/text%3E%3C/svg%3E)


Straight to the point and easy to follow. I was up and running with SQLite and the Browser in under two minutes. Exactly what a Linux tutorial should be.